|
Some Articles being relocated from the Solent Group Page about beginning in LGB etc multimeter 1 preparing the ground 2 bringing light to the little people 3 converting from analogue to digital 2002 - Our start in G Scale in the Garden - The opening 2 loops, Going Digital and the branchline 2003 Growth along the Satellite Extension Railway 2004 Building Growth and the Airport Begins 2005-2006 Full Steam Ahead ... 2007-2010 Changes resulting from our house extension 2011-2016 Mirror Mirror and Curved Points 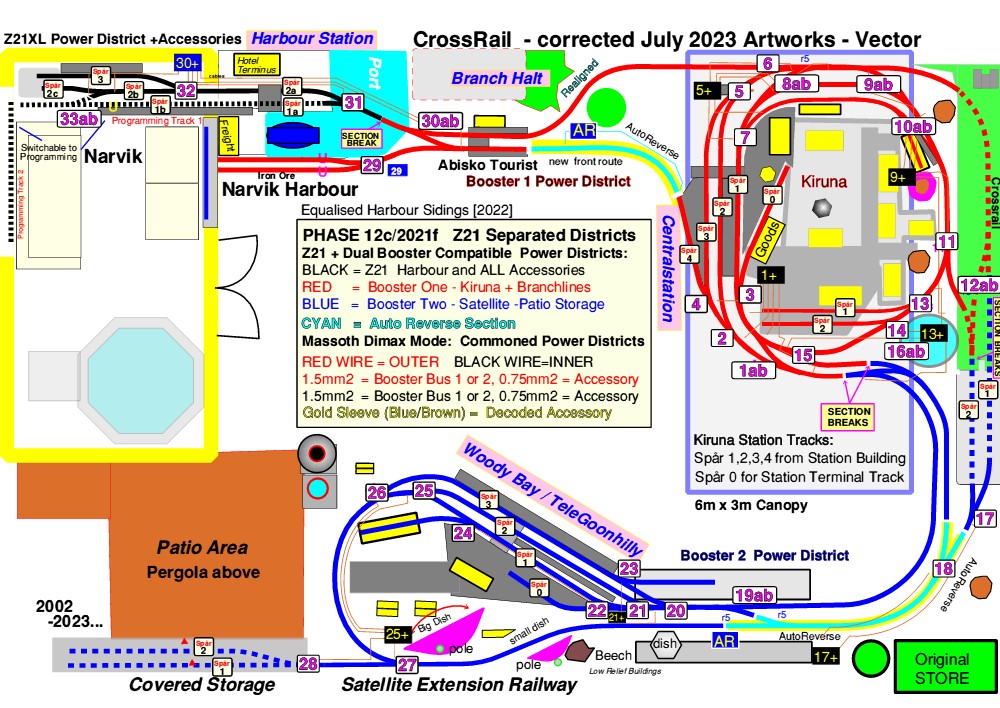
|
|
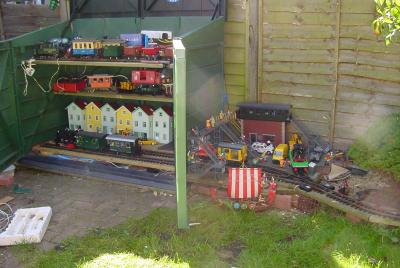
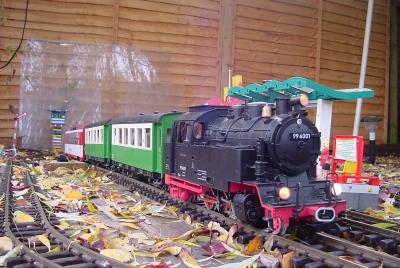
Our Garden Layout in its current form - In 2002 it started as 2 extended loops underneath the Willow Tree - which were connected together once we went digital with LGB MTS2 (then MTS2P, MTS3, Massoth + now Z21 XL). 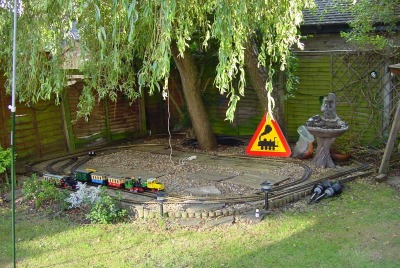
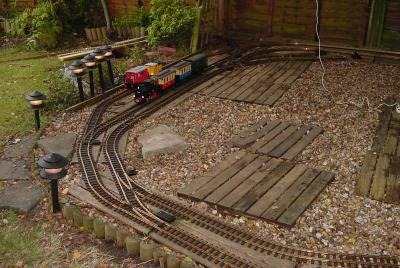 More early garden photos in our Solent articles above for 2002-2006 The first extension was back toward the house and a drive-in Storage Shed with shelves above the track for storage and our 1st Solent open day. Wireless Control and duplicated power 'heavy duty [low voltage high current] loudspeaker cable supplied multiple feeds around the layout to minimise the effect of any poor rail joints: Fishplate contact tends to deteriorate in a few years - and so all of our rail joins now use Massoth rail joiners which also make power connections easy. 
 * Trialling the 'normal' 3A Roco Z21 in the garden required the use of the dual 2x 3 Amp Z21 Booster and therefore 3 sections - giving us 3A + 3A + 3A to run trains - because we could have 2 twin-motor locos in any one section, which would exceed the 3A limit .... having been used to 5A - 8A as our normal limits with the 5 Amp LGB MTS or 8 Amp Massoth. Now we have the 6 Amp Z21 XL and finally, for 2024 onwards, the much delayed 6 Amp Z21 XL Booster - which we will use for the garden with 2 sections. 
 For our portable Shunting Puzzles and even the longer 'Linear Modular using large locos, we have found that the 'normal' Roco 3Amp Amplifiier, MultiCentralePro or Z21/z21 have no problem as these are usually operated on the level and only 1 loco moving at a time - an LGB loco with Buhler Motor(s) typically takes 1-2 Amps. Some US makes take 5 Amps! The one exception is the 3-car Allegra EMU with 4 motors stalling and tripping the 3 Amp power if it hits the buffer stop! Upgrading from an Analogue OR Digital '1 Amp' Controller to a 3-5-8 or 12 Amps 'Multiple Loco Running DCC Controller needs the wiring and track resistance to be checked! With the ability to provide 5A or more ( 8Amps with our Dimax800 and 12 Amps with a Dimax1200 ) comes the responsibility to ensure safe operation by ensuring that a short circuit trips the electronic breaker! My guides above list the comparative values needed for controllers from 1 to 12A NORMAL maximum current continuously ... which are designed to trip at current proportionally above the norm! Therefore a track needs to have a low-enough-resistance to ensure that the furthest short circuit trips the breaker - also known as the 'coin' test on the track. A further consideration and difference from 'analogue' is the 'voltage drop' that can occur in 'more distant' parts of the track: especially with Sound-fitted locos, which might cut-out if the voltage dropped was more than (say) 2volts .... the likelyhood of this varies with the gauge and number of locos / illuminated coaches etc in use..... There are those who advocate 'a wire to every piece of rail' .. omitting to mention the scale / gauge they're considering - making the comment effectively meaningless! Again, this is discussed in the conversion guides above. Test and Measurement is the only real answer to ensure correct operation to minimise potential problems arising. N gauge Code 55/80 track made from Nickel Silver has a much higher resistance that LGB Code 332 brass section rail - which probably has less resitance / metre than my 'high current' speaker wires ... until you get bad rail joints: a new track may work faultlessly, but a year or two later be intermittant. Graphite/Copper grease on the joiners helps. How much current do the coach lights take ? How much current do your locos take ? When I first wrote the guide, many coaches were lit by bulbs and not LEDs. Some 'USA-made' locos can require 5A normally, whilst a 2-motor LGB may barely reach 2 Amps - although this also depends on gradients, curves, and train length. In analogue it was basically 1 loco for 1 section at a time, and turn up the knob is the speed dropped. In digital it is ALL locos at all times with a constant supplied track voltage - each adding some load and causing a voltage drop at the more distant lengths of track. Peco(R) G scale track has a much smaller {'finer'} cross section than LGB/Piko/Aristocraft, and consequently higher resistance compounded by being nickel silver not brass. Multiple trains running on 'ex-analogue' wiring is therefore likly to suffer a loss of power - even enough to stall trains ! IT IS NOT, therefore, okay to 'upgrade' from a 1 Amp starter controller to a 5A or more multi-train (ie digital) controller without checking that the wiring is good enough to trip the ( higher current needed to) trip the breaker !!! This applies in any scale from Z to G. A mistake I made, a few years ago, was to use 'CCA' Copper-Clad-Aluminium wire which has low strength - can fracture in bends - and corrodes when used outside in 1 year! This is also one reason why a 'switchable analogue-digital layout' is frequently the worst case example of reliability, operability and perhaps safety !! (unless a 1A limit) 'We shall Overcome' or 'Divide and Conquer' By Dividing the digital layout into similar section sizes as in analogue [but not necessarily positions], and LIMITING the current in EACH section - the need to reach the controller's trip current is avoided. PSX or other intelligent circuit breakers offer controlled-start-up and automatic re-connection attempts. Some use 'bulbs' as heat-sensitive variable series resistance - glowing and increasing resistance if a high current is drawn - but this is much slower and less effective than a fast-acting electronic circuit breaker ... and high speed protection helps prevent damage to circuitry. DCC / Mfx controllers have inbuilt electronic protection basedon their maximun normal continuous current rating. A visual test of adequacy in our garden is to operate the points ( dcc via the track to the point decoders ) and see if the lights on any nearby trains are visibly affected. If they dim,, then the power feed is inadequate. { I experienced the 'opposite' effect with my Zero-1 when running the APT set in the 80's: the high, and intermittant current of the motor bogie 'triggered nearby point modules into changing the points the APT was passing over !!! .... I rewired the layout to separate track and accessories - this was a useful lesson for later dcc 00/H0 layouts with live frog points etc. Other ways of 'Problem Avoidance' are to use Battery-operated R/C locos or live steam .... creating a different set of issues. Purpose and Intent? All garden layouts are different - according to the geography of the garden and the preferences of the owner/builder. Ground level or elevated is an obvious choice. Continuous running loops and / or end-to-end shunting operations ... or a combination of the 2 ? Our layout has 3 station areas, 2 running loops, and sidings/storage for whole trains to be alternated .. we leave the intensive shunting to the shunting puzzles 8-) Where we live, even treated timber in contact with the soil rots in 3 years. However I do not recommend the inflexibility of laying the track IN concrete .... we have lightweight blocks and weed-control fabric under about half our track. Life beneath trees can also require a lot of track cleaning - for which the LGB track cleaner 2067 is useful, if not 'essential'. Even though the Willow is no more - we still have several Silver Birches, and therefore operate points 'multiple times' to ensure we can hear the blades moving freely from one side to the other - and not blocked by a fresh Katkin ! In the years since we started LGB in 2002 our layout has had 12 'phases' of building - some merely expansion, but others involving rebuilding of hole areas. Under the willow tree we originally had 20mm pebbles and wooden patio tiles ... all now gone and replaced by fine stone - of a size which does not jam in point mechanism |
'New Sealink Ferry' G Scale Portable Layouts (mostly seen at Hollycombe) Double-deck transportable Scandinavian H0 Layout |